Military Tactics (SQA National 5 History): Revision Note
Exam code: X837 75

Summary
Military tactics during the Great War were dominated by artillery. Bombardments were used to cut wire and blow up trenches before the infantry soldiers advanced to try and capture enemy trenches and push back the enemy line along the Western Front.
To advance, soldiers had to ‘go over the top’ and try to cross through 'No Man’s Land'. This was incredibly dangerous, and many infantry soldiers lost their lives to machine gun fire while trying to advance.
General Haig, Commander in Chief, favoured large offensives to wear down the enemy. He instructed the military tactic of the creeping barrage, which is a timed moving curtain of shells that infantry followed closely for cover.
What was 'going over the top'?
'Going over the top' was the term used to describe when soldiers climbed from the front line trench into 'No Man’s Land' to attack the enemy line
The chain of events of this tactic was usually:
First, an artillery bombardment on the enemy trenches
To destroy the enemy trenches, kill soldiers and destroy the barbed wire
Second, the soldiers attack the enemy trenches by 'going over the top' and through 'no man's land'
As soldiers approached the enemy, they would shoot or throw grenades at the enemy
Finally, if soldiers entered the enemy trenches, they would attack the soldiers in the trenches and take control of the trench
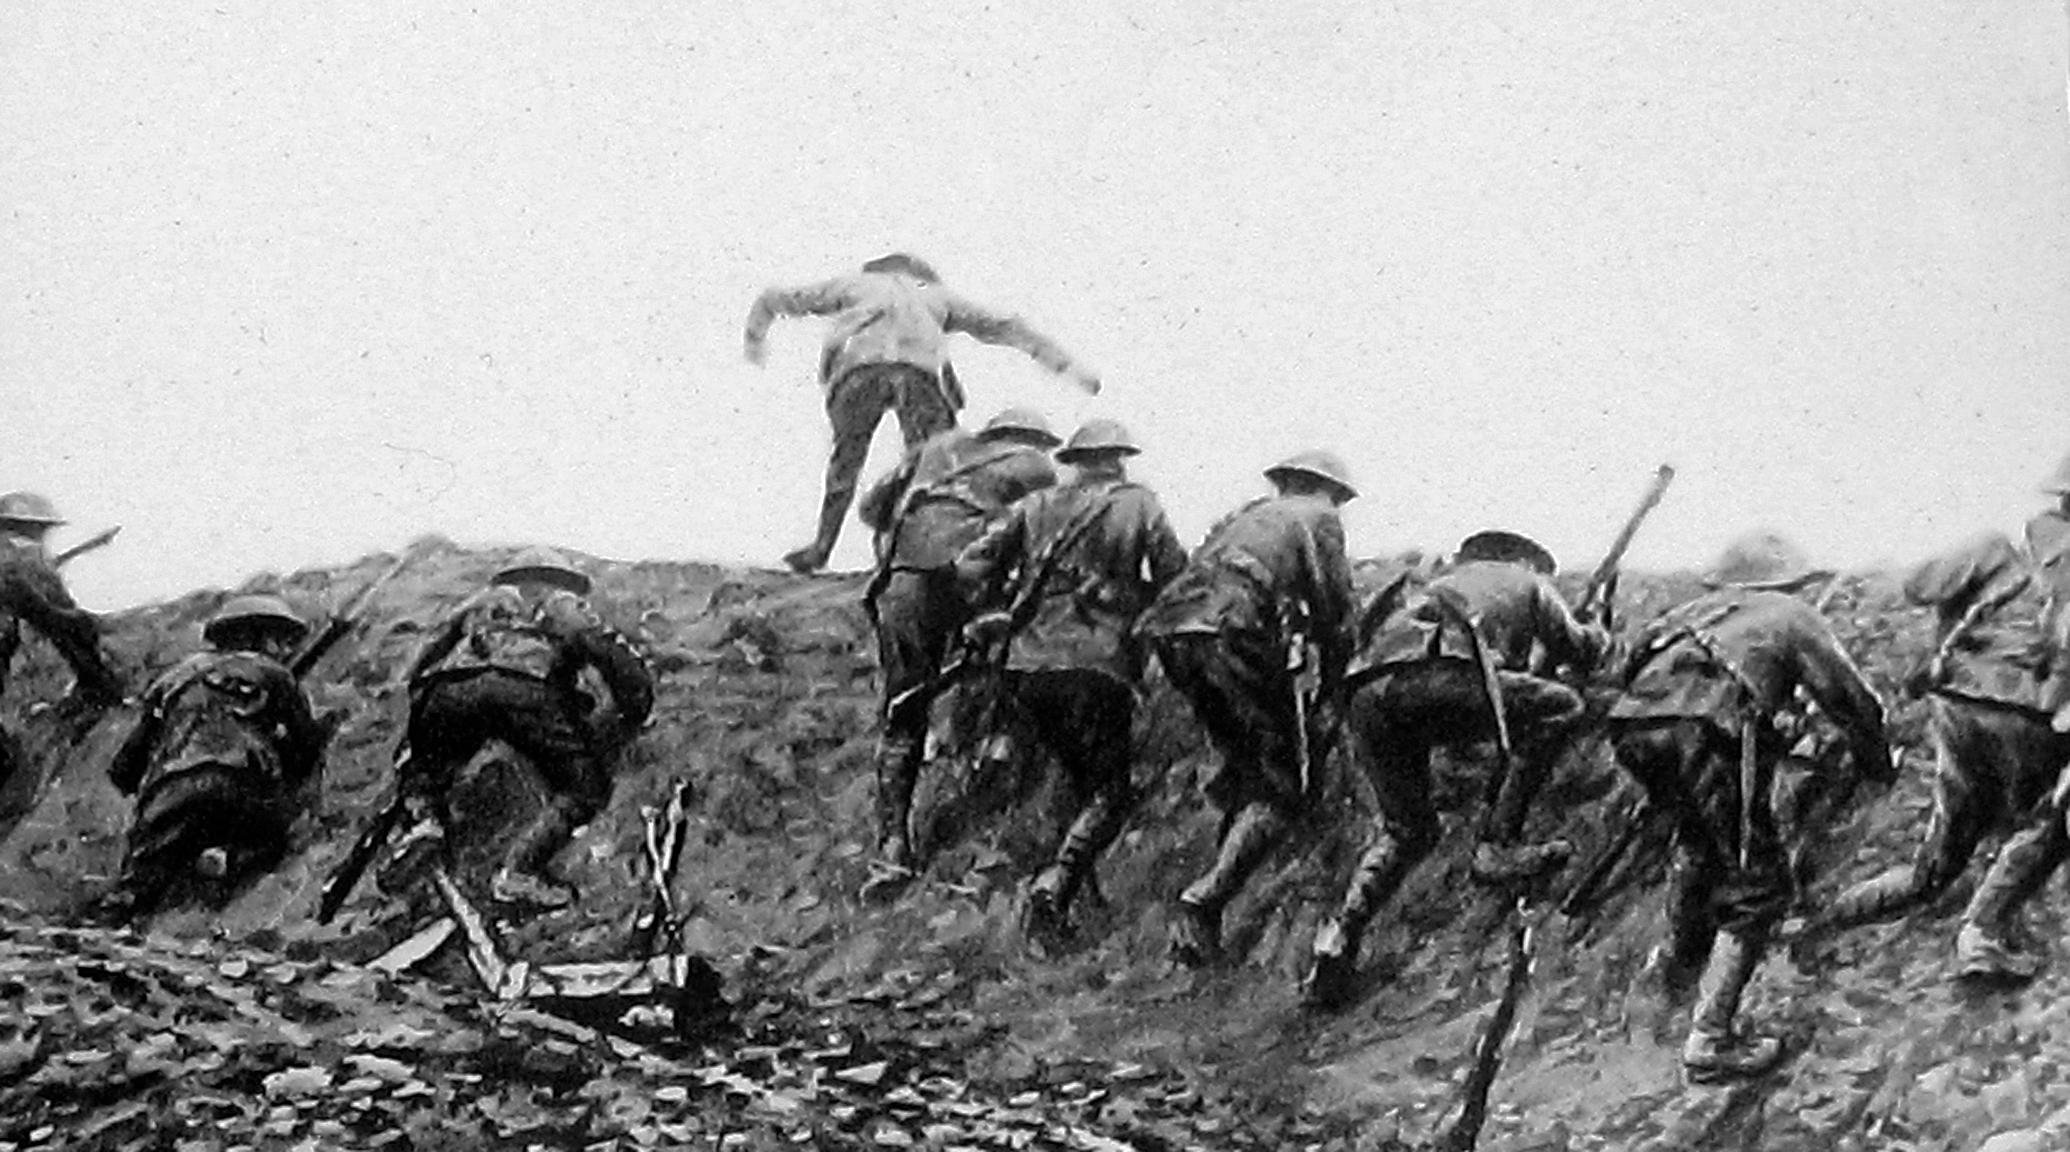
Disadvantages of 'going over the top'
The advance was made more difficult because of the barbed wire and deep shell holes in 'No Man’s Land'
Soldiers got caught in the barbed wire as it was not cut by the shells
The muddy conditions of no-man's land resulted in some soldiers being stuck or drowning in the mud
The soldiers were often under artillery bombardment or machine gun fire as they attempted to advance
Artillery shells caused more than 50% of the wounds
Bullets caused almost 40%
'Going over the top' and crossing 'No Man's Land' was difficult and many soldiers were killed trying to do so
Haig and the creeping barrage
Field Marshall Sir Douglas Haig commanded the British armies from 1915 to the end of the First World War
During the First World War, Haig was responsible for many British offensives
These included the Battle of the Somme and Passchendaele

As Commander-in-Chief from late 1915, Haig favoured the creeping barrage as a military tactic
A creeping barrage was a timed, moving curtain of shells that infantry followed closely for cover
Units such as the 51st Highland Division used tight barrages at Beaumont Hamel (Nov 1916) and Arras (1917).
The success of the creeping barrage depended on pace and communication
If men fell behind or rounds fell short, the number of casualties could be high
Worked Example
Compare the views of Sources A and B about military tactics on the Western Front. (Compare the sources overall and/or in detail.)
[4 marks]
Source A
General Haig was worried about attacking at Loos as he knew his soldiers would have almost no cover and would find it hard to advance. Haig also wanted to keep the reserve troops close to the Front Line to achieve a breakthrough. Battalions from every Scottish regiment fought at Loos and ultimately, 7,000 Scottish soldiers were killed. The Battle of Loos was a total tactical failure for the British.
Source B
The Battle of Loos was fought in September 1915 on the Western Front. The British had some tactical success at Loos. General Haig, however, was accused of being over-ambitious about his attacking troops achieving a breakthrough. Haig’s commander, Sir John French, thought that Haig’s tactics for the reserve troops risked high casualties without guaranteed success. After the battle, Haig and Sir John French never resolved their differences
Answer
Source A states that Loos was a “total tactical failure” for the British, while Source B says the British had “some tactical success” at Loos, [1] so the sources disagree overall about how effective the tactics were. [1]
Source A states Haig wanted to keep reserve troops close to the Front Line to exploit a breakthrough, whereas Source B reports Sir John French thought Haig’s reserve tactics risked high casualties without guaranteed success, [1] so the sources disagree on the handling of reserves. [1]
Examiner Tips and Tricks
To answer questions with sources, it is essential that your answer is supported by specific references to both sources.

Unlock more, it's free!
Join the 100,000+ Students that ❤️ Save My Exams
the (exam) results speak for themselves:

Was this revision note helpful?